FANSLY MANAGER // FREE SESSION_

FYP guide: posting templates

How to build reusable presets and schedule them on Fansly’s calendar

* Back to Fansly Manager

What this guide covers

This session shows how to use the scheduling tool so you build a post body once and reuse it on Fansly’s official calendar. The point is to stop manually picking media, writing hashtags, and setting permissions every time you promote. It's recommended read the textual guide, and, at then end of the section, watch the video resource as visual complement.

:: REQUIRED_ ::

You need the Fansly Downloader extension installed (and an active Fansly session). Install steps are on the downloader page.

[ Install extension ]

:: IMPORTANT_ ::

Before you automate, understand manual posting on Fansly: walls, permissions, expiration, and FYP-oriented content.

[ Official posting guide ]

1. Open the tool

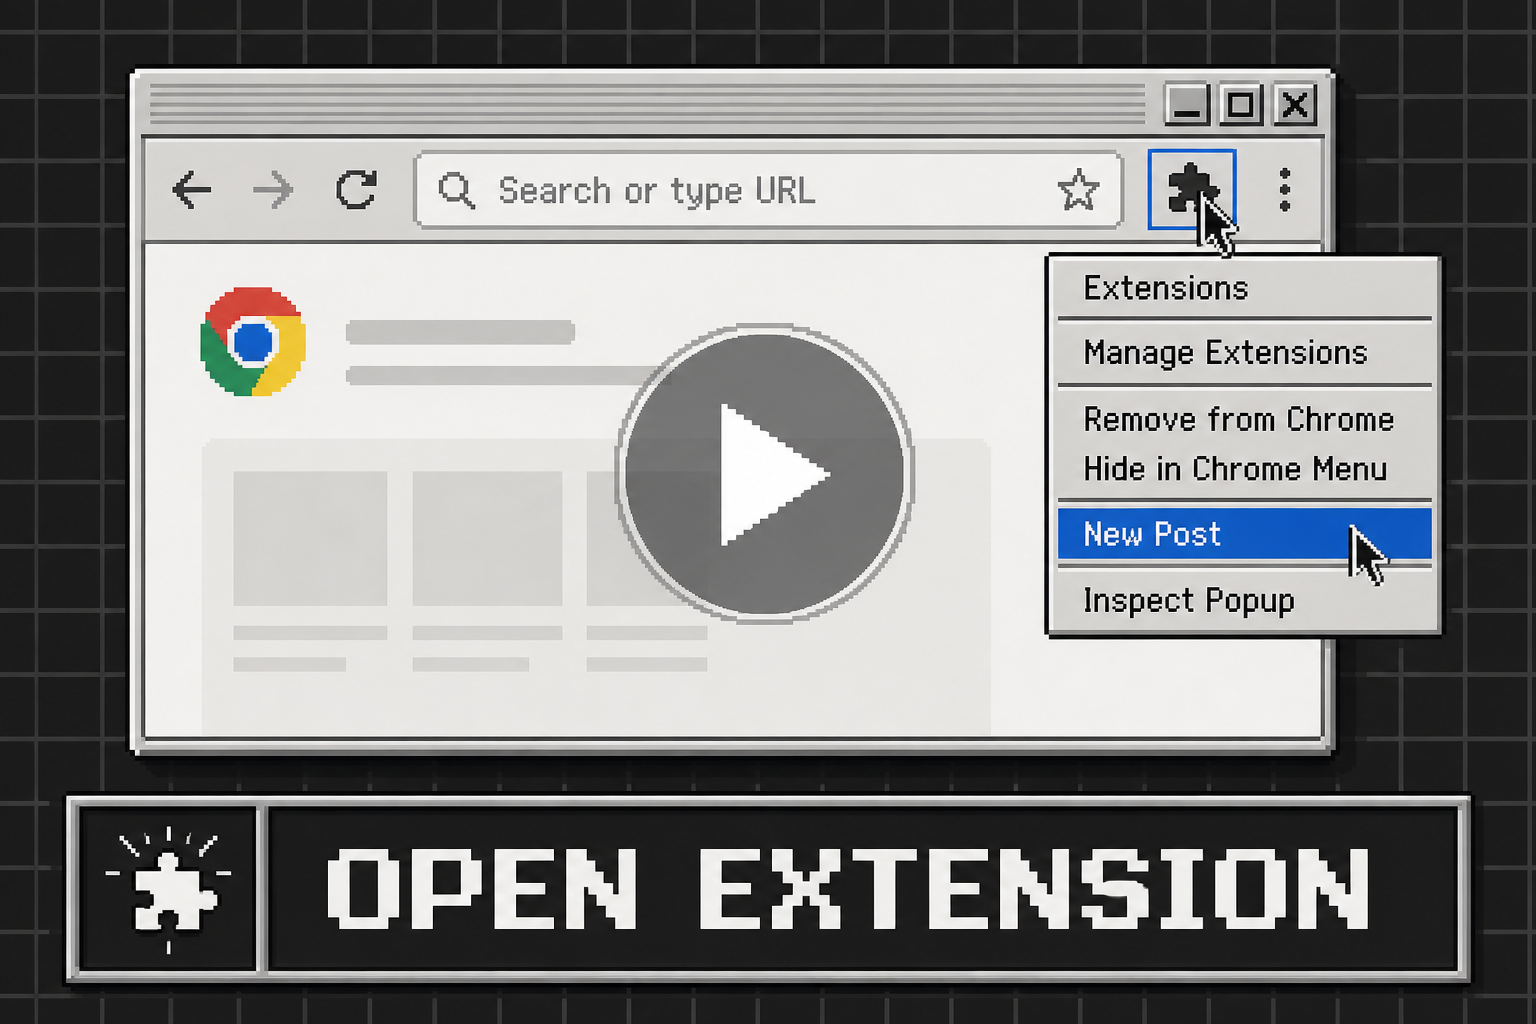
With the extension installed, open the puzzle icon (Extensions) in the top-right of the browser. Pin the extension so it stays visible. Then right-click the tool icon and choose the option to create a post (New Post).

:: TIP_ ::

If it is not pinned, it gets buried in the extensions menu and slows you down every session.

A window opens asking for the information needed to build templates and schedule recurring posts without re-selecting content and copy every time.

How to open the extension on Google Chrome browser

2. Account-level hashtags

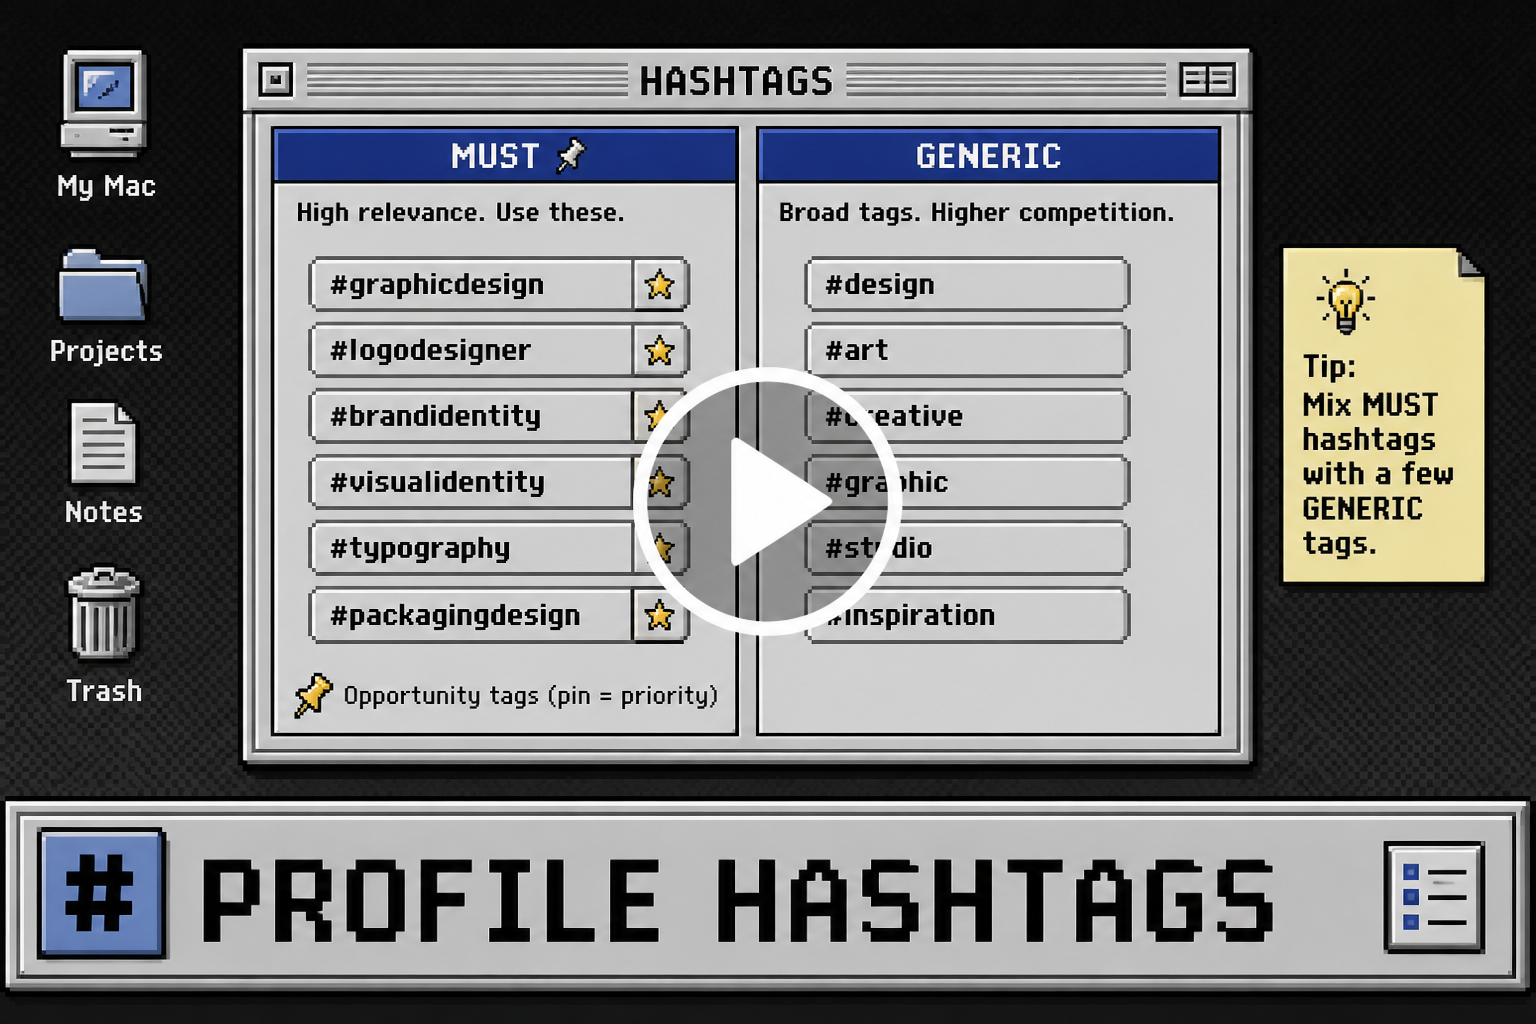
The first setup step is the profile hashtag catalog. There are two groups: required (must) hashtags and generic hashtags.

:: TIP_ ::

Type a hashtag, press Enter, then save. You can add a test tag just to learn the flow and remove it afterward.

:: REQUIRED (MUST) HASHTAGS_ ::

Tags that fit your profile no matter the post angle — language, niche baseline, identity. Also include opportunity tags: high user search volume and low creator supply. Those help the profile stand out in discovery because demand exists and competition is thin.

  • They should work on almost any post from the account.
  • Prefer high search + few posts over trendy but crowded tags.
  • Think stable discovery, not a one-off theme.
:: GENERIC HASHTAGS_ ::

They can still fit most posts (language, broad traits, etc.), but they are often saturated: people search them, and many creators already use them. Useful — not something to rely on alone.

  • Use them strategically, not as your only plan.
  • Split mentally: low competition → must; high competition → generic.
  • Save the catalog when finished; you can edit it later.
Creating the hashtags for the profile

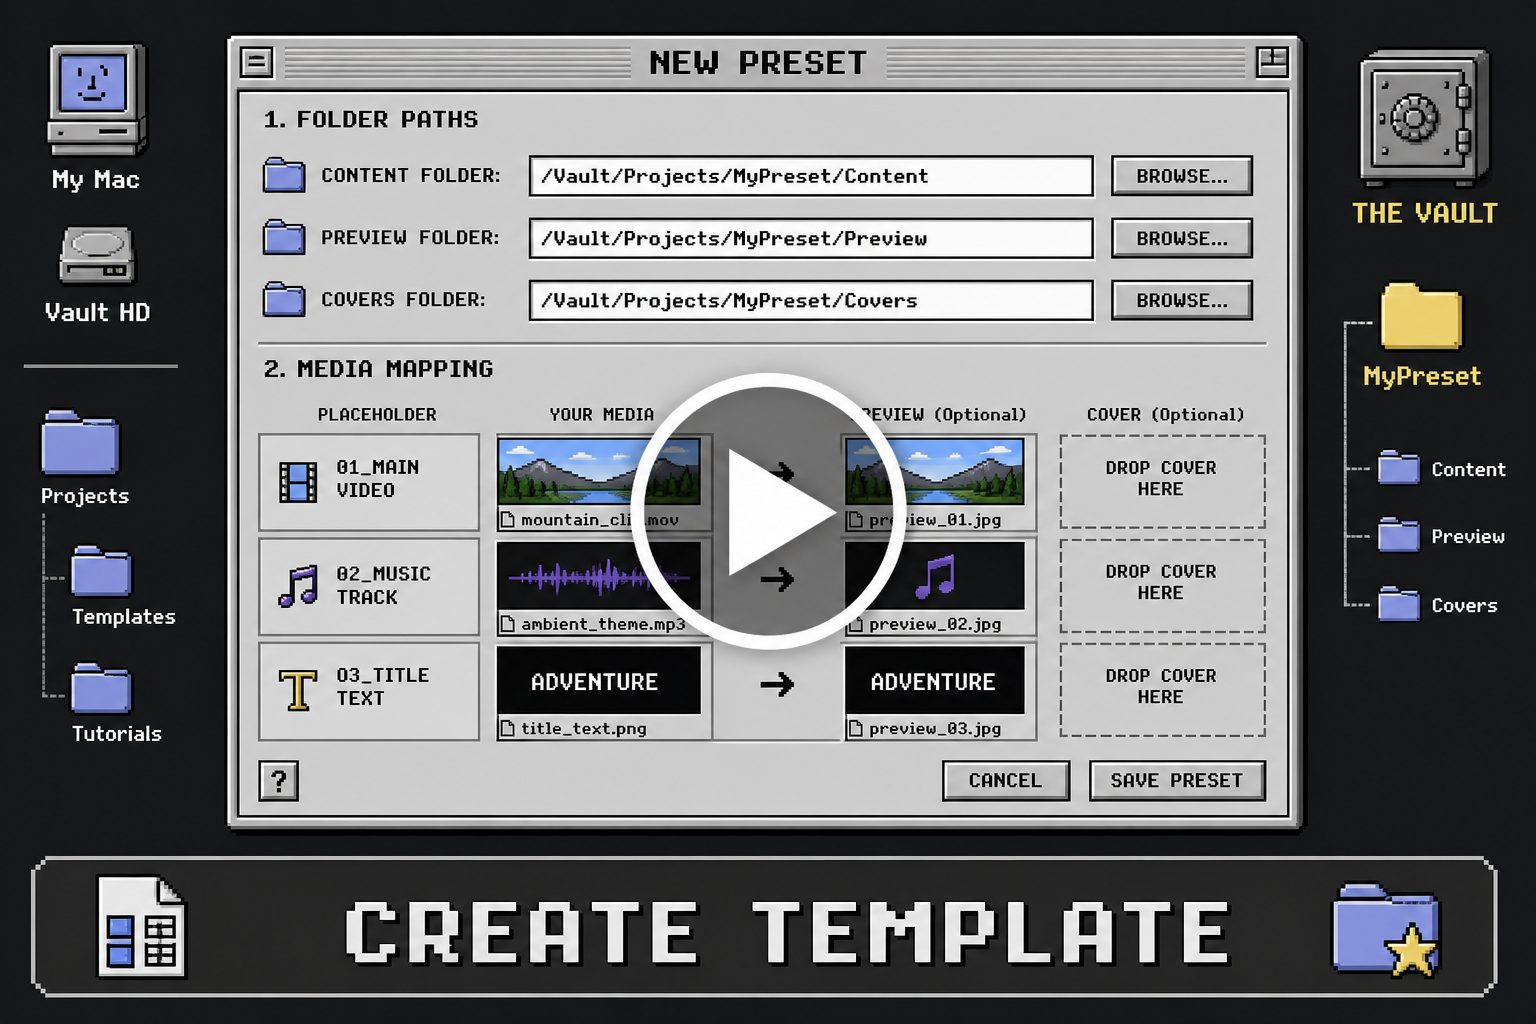
3. Create a template (New Preset)

With account hashtags saved, click New Preset in the top-right. Each template describes a content angle and how it should publish: folders, permissions, content hashtags, and the mapping between paid media, promo clips, and covers.

:: TIP_ ::

When picking content hashtags, compare views vs post count. High views + few posts (strong “demand”) usually beats a saturated tag. Misspellings can help if users search them and supply is low.

:: CREATE A TEMPLATE (NEW PRESET)_ ::
C:\> Template name
A clear label for the theme or set. Makes picking presets easier when you schedule later.
C:\> Content folder
Folder with the paid media you are promoting — where those files actually live.
C:\> Preview folder
Promo / teaser clips. A suffix like “for your promotion” keeps them easy to spot on disk.
C:\> Cover folder (recommended)
Video thumbnails. Optional, but helps the platform detect covers on your profile. A “covers” suffix keeps folders tidy.
C:\> Purchase permissions
The same advanced permissions Fansly shows when you attach media: subscription, PPV price, view time, etc. Saved into the preset with Save Preset.
C:\> Content hashtags
Not the account-wide generics — tags that match this video’s context, setting, and related searches.
C:\> Media ↔ preview ↔ cover mapping
Relate each paid item to its promo clip and covers. Drag only what you need — you do not have to empty whole folders. Folder-based organization keeps the mapping clean.

When everything is filled in, create the template. It appears below with name, permissions, hashtags, and the rest. You can keep several presets and select one or many when scheduling.

Creating a template from existing content of the vault

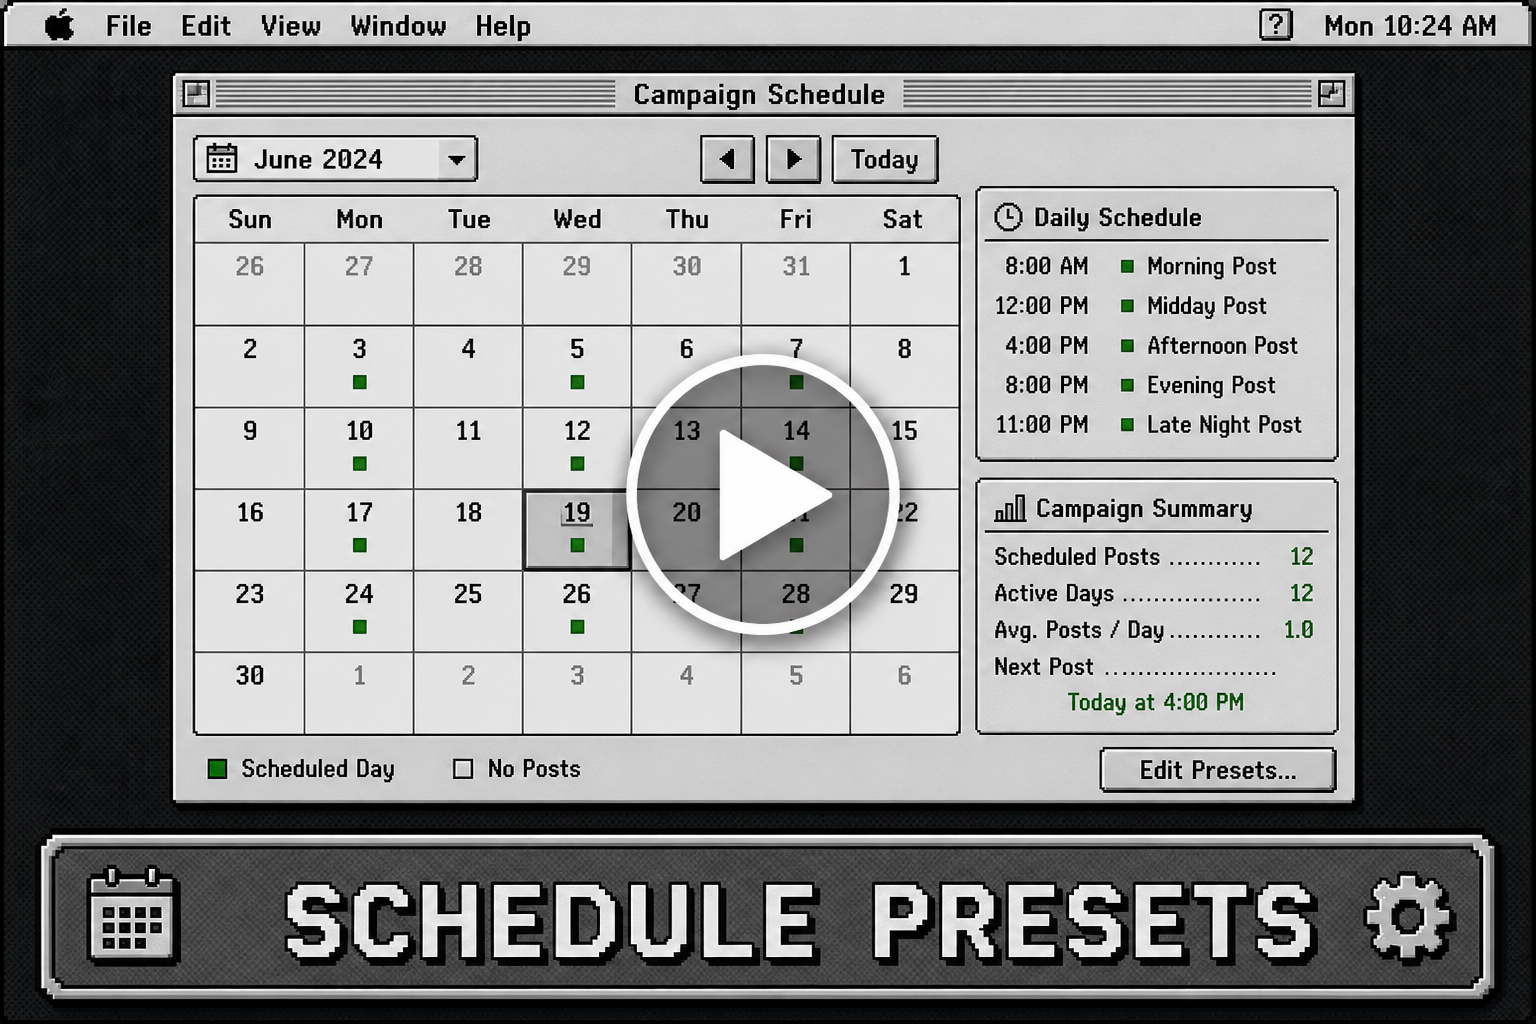
4. Schedule on the calendar

Select the template (or several) and define how posts are distributed across the day or date range.

:: SCHEDULE ON THE CALENDAR_ ::
C:\> Date range
From which day to which day. The same date on both ends means a single publish day.
C:\> Wall
Where it posts. A private wall reduces spam for followers; the default wall shows profile activity. Pick based on visibility vs cleaner promotion.
C:\> Auto delete
How long the post stays before deletion (e.g. three days after publish). Stops old promo from clogging the feed.
C:\> Frequency and time
How many times per day and at which local time (e.g. once at 1:00 p.m.). Green-marked days preview the plan before you confirm.
:: CHECKLIST_ ::
  • Check the summary: dates, hours, deletion, and media variants.
  • With several clips/covers, the app shuffles them evenly so the same combo does not always repeat.
  • If you schedule a lot with few alternatives, repeats are normal until the range is filled.
  • “Shuffle map” swaps clip and cover in the summary before you confirm.
Scheduling presets on fansly calendar

5. Authorize and start the campaign

When the summary (clip, cover, hashtags, duration, permissions) looks right, confirm and initialize the campaign. Then open Fansly’s calendar: the post body is generated for you, with a short description tied to the template hashtags.

:: TIP_ ::

Once a template exists, you can rerun the flow for longer ranges (e.g. the 5th–12th) in a few clicks: do the mechanical setup once and reuse it in the portal.

Editing the scheduled post should show the promo clip (e.g. your blur edit), the chosen cover, and the saved permissions (subscription, view minutes, PPV price, etc.).
Practical takeaways

:: CHECKLIST_ ::
  • Pin the extension and open New Post from the context menu.
  • Split must hashtags (opportunity + always-on) from saturated generics.
  • Each preset ties folders, permissions, content hashtags, and media ↔ preview ↔ cover mapping.
  • The calendar sets dates, wall, deletion, and times; shuffling avoids identical posts.
  • Confirm only when the summary matches what you want to publish.

// FYP GUIDE // FANSLY MANAGER // TEMPLATES READY //